Ralsina.Me — Roberto Alsina's website

Posts about linux (old posts, page 22)

Desktop setup

Introduction

I am a long-term KDE us­er. How long ter­m? Well, since 1997 or so with in­ter­mit­ten­cies. A cou­ple of weeks ago, I switched my per­son­al desk­tops to QTile.

Manda­to­ry screen­shot:

A desktop

Why?

Well, I like to switch things around ev­ery few years. I have used Uni­ty, and MATE, and even LxQt at some point, and I have no­ticed over the years that I don't tend to over­lap win­dows, so tiling win­dow man­agers are the nat­u­ral pro­gres­sion of my us­age.

For a few years I have used Krohnkite an awe­some KWin ex­ten­sion that has re­al­ly been a plea­sure to use and proved me that a tiling WM, with a few rea­son­able key­board short­cut­s, was a work­able so­lu­tion.

Late­ly I have been build­ing a home­brew lap­top which has fair­ly lim­it­ed hard­ware, but I want to use for re­al. So I al­so want­ed to ex­plore ways to low­er re­source us­age.

Oth­er re­lat­ed con­cern­s:

  • I have very dy­nam­ic mon­i­tor con­fig­u­ra­tions. My com­put­ers gain and lose mon­i­tor all the time, and this needs to be han­dled au­to­mat­i­cal­ly.
  • I have mul­ti­ple com­put­ers (work, home, home­brew) and they all have very dif­fer­ent set­ups and con­fig­u­ra­tions, but I want them all to work the same.
  • I use chez­moi to man­age my con­fig­u­ra­tions so I want con­fig to be sim­ple text files I can store with a min­i­mum of tem­plat­ing.
  • I want com­fort. I want disk au­to­moun­ing, vol­ume keys, blue­tooth menus, wifi con­fig­u­ra­tion, a clock, bat­tery in­for­ma­tion, no­ti­fi­ca­tions and so on.

But why QTile specif­i­cal­ly:

  • It's tiling but with a nice at­ti­tude. The whole "hard­core" thing in both tiling WM users and projects is a bit tire­some.
  • It's writ­ten, con­fig­urable and ex­tend­able in Python, which I like.
  • It works rea­son­ably out of the box. No, a black screen where you can do noth­ing with­out look­ing up short­cuts in your phone at first is too much.
  • It's "dy­nam­ic". This is one of those minute sub­cat­e­gories you can see in WM fan­dom, but ba­si­cal­ly: win­dows get placed more or less cor­rect­ly by de­fault, while oth­er WMs will make you ex­plic­it­ly han­dle each win­dow as it ap­pears, which sounds sort of like tor­ture to me.

So what?

So I will now de­scribe painstak­ing­ly ev­ery de­ci­sion I made as of to­day, and de­scribe the im­por­tant con­fig­u­ra­tion, and bore any­one who tries to read this to tears, that's what.

In an at­tempt to make this a bit less an­noy­ing I will set­up a prob­lem, then de­scribe the so­lu­tion I found.

Uniform UI for utilities

The Problem

There are a num­ber of ways you in­ter­act with your "desk­top". You may want to lo­gout. Or start an ap­p. Or run a com­mand. Or con­fig­ure a blue­tooth speak­er. Or see the clip­board his­to­ry. Or con­fig­ure wifi.

In the desk­top world, this all comes in­clud­ed in the pack­age deal. In the Win­dow Man­ag­er uni­verse, you have to roll your own, and most set­ups end with a dis­parate col­lec­tion of util­i­ties, like blue­man and net­work-­man­ag­er and clip­it and so on plus what­ev­er the WM it­self pro­vides.

Well, but what if they could be the same thing?

What if in ad­di­tion they could all share a love­ly, cus­tom­iz­a­ble UI?

The Solution

En­ter rofi

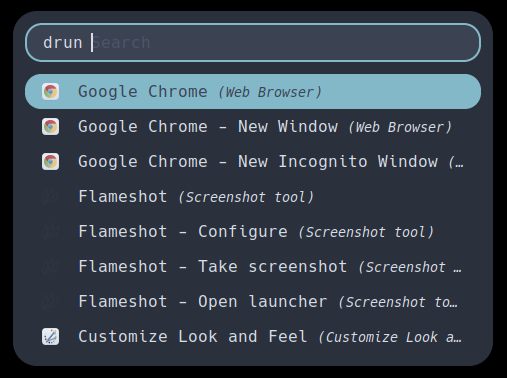
the most com­mon us­age for rofi is as an app launcher, and it's great at that, but it's just scratch­ing the sur­face:

rofi as launcher

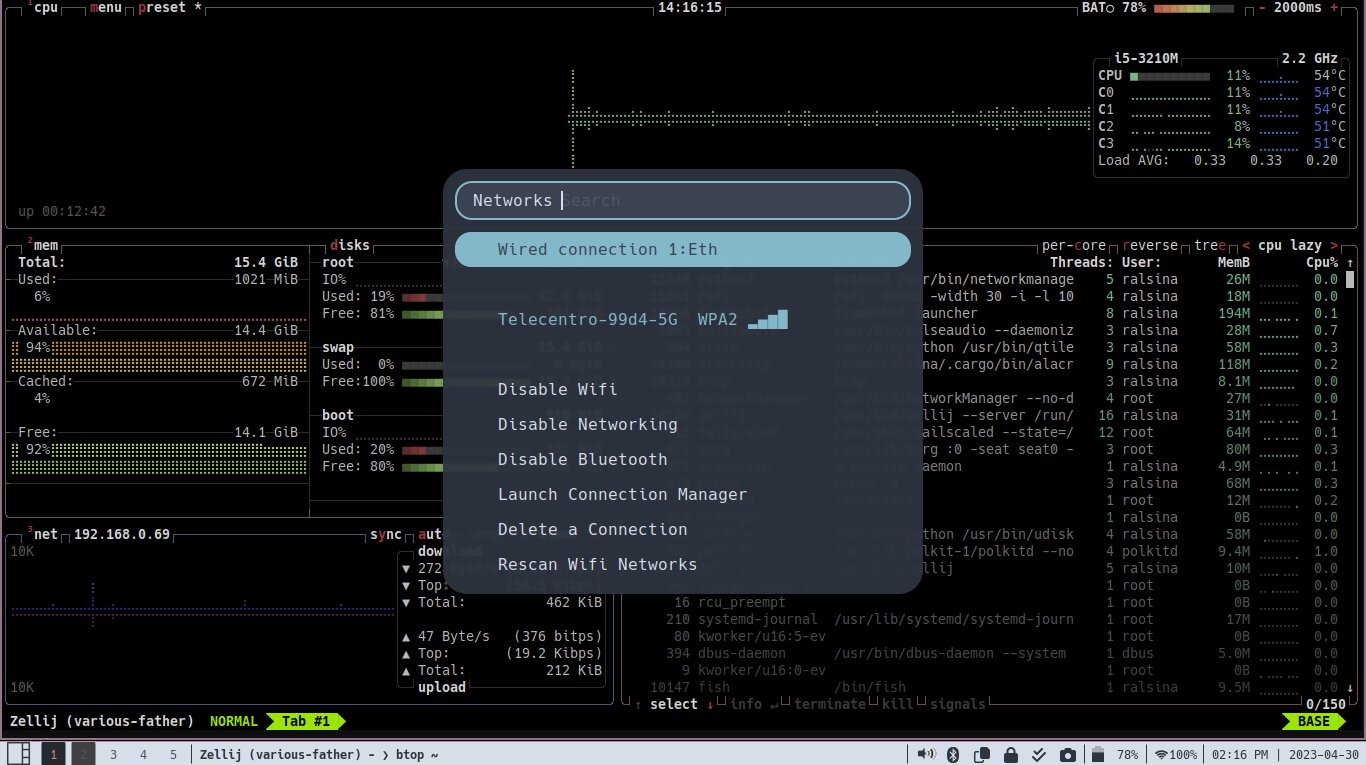
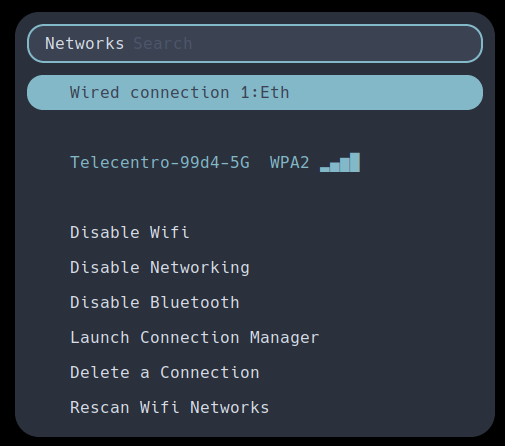
Be­cause of its flex­i­ble ar­chi­tec­ture, it can be used to con­fig­ure your net­work us­ing net­work­man­ager-d­menu:

rofi as network manager

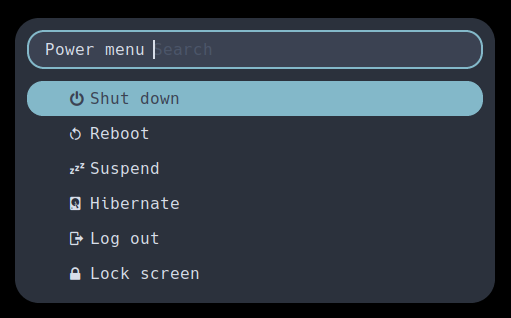
As your pow­er/l­o­gout menu via rofi-pow­er-­menu

rofi as power menu

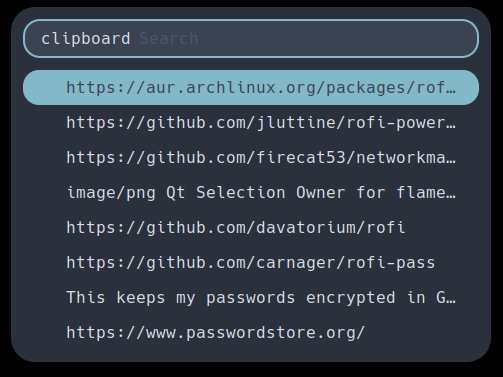
And much more. I al­so use it as a front­ed to a pas­word man­ag­er, a fron­tend to ssh, a sim­ple To­do list, an emo­ji pick­er, as a fan­cy win­dow switcher, and as a clip­board his­to­ry man­ag­er us­ing rofi-­green­clip

rofi as clipboard manager

Rofi starts so fast that it's of­ten im­posi­ble to no­tice the dif­fer­ence be­tween hav­ing a tool al­ways run­ning and with an icon in the systray and just hav­ing a but­ton that launch­es rofi.

So, how do I use it in my ~/.config/qtile/config.py?

Bound to some key short­cut­s:

keys = [
    # Launch things
    Key([mod], 'p', lazy.spawn('rofi -show drun'), desc="Run app"),
    Key([mod, "shift"], 'p', lazy.spawn('rofi -show run'), desc="Run Command"),
    Key([mod], 's', lazy.spawn('rofi -show ssh'), desc="Ssh"),
    Key([mod], 'e', lazy.spawn('rofi -show emoji'), desc="Emoji"),
    Key([mod], 'v', lazy.spawn('rofi -modi "clipboard:greenclip print" -show'), desc="Clipboard")
    Key([mod, alt], "Tab", lazy.spawn('rofi -show window'), desc="Move focus to next window"),

I al­so added a Launch­Bar wid­get to my QTile bar where it re­places some­thing like clip­it, the blue­man ap­plet, a pass­word man­ag­er and a to­do ap­p:

    widget.LaunchBar(padding=0, text_only=True, font="Font Awesome 6 Free", fontsize=16, foreground="2e3440", progs=[
        ("", "rofi-bluetooth", "Bluetooth"),
        ("", "rofi -modi 'clipboard:greenclip print' -show", "Clipboard History"),
        ("", "rofi-pass", "Passwords"),
        ("", "rofi-todo -f /home/ralsina/todo.txt", "Todo"),
        ("", "flameshot gui", "Screenshot"),
    ]),

The first field that prob­a­bly looks like a square in there are uni­code char­ac­ters dis­played on the desk­top us­ing font awe­some:

launchbar that uss rofi

Al­so for mouse in­ter­ac­tions with the Wlan wid­get:

widget.Wlan(format=" {percent:2.0%}",width=54, mouse_callbacks={'Button1': lazy.spawn('networkmanager_dmenu')}),

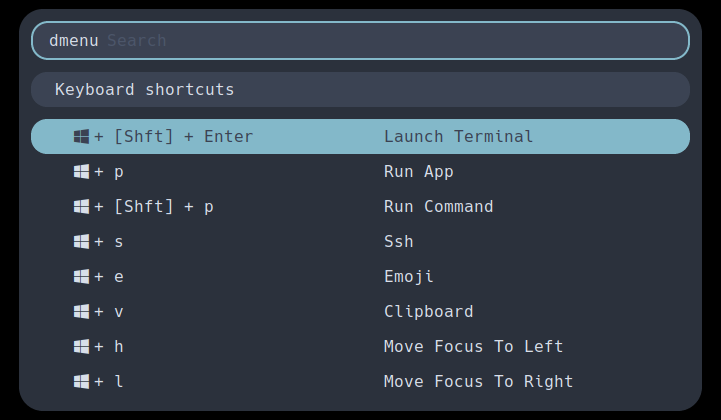
I even use it to show me the short­cut list in case I for­got any!

rofi showing shortcuts

I could write some mi­nor code and use it for oth­er things too. Rofi is a mag­nif­i­cent ex­am­ple of a tool with a nice API that you can lever­age to make it do many dif­fer­ent things.

Display Configuration

The Problem

My dis­play con­fig­u­ra­tions are many. I use note­book­s, so they all have one "de­fault" con­fig­u­ra­tion where they use their own screen.

In one case, it's all it can use.

In an­oth­er, it's per­ma­nent­ly docked to a mon­i­tor above its screen, but some­times I close the note­book and the on­ly dis­play is the mon­i­tor.

In an­oth­er it's usu­al­ly docked to a mon­i­tor be­sides its screen, but it's shared with my work com­put­er, so it los­es and re­cov­ers that mon­i­tor dozens of times via a HD­MI switch through the day as I switch tasks.

While QTile han­dles grace­ful­ly the ad­di­tion and re­moval of dis­plays in gen­er­al, there are some is­sues.

  • Us­ing the HD­MI switch did­n't make the mon­i­tor "go away" which caused some is­sues with bar­ri­er
  • The con­fig file de­scribes the "bars" for each screen. So I need to put the main bar that has the systray on a screen that is al­ways on. But the screens are one per-out­put and in a ma­chine-de­pen­dent or­der, and things got com­pli­cat­ed re­al­ly quick. Here Plas­ma does the right thing ef­fort­less­ly.

The Solution

En­ter au­toran­dr an awe­some tool that will re­act to changes in your sit­u­a­tion and do the right thing.

How?

  • Set your machine as you normally use it say, with two monitors using arandr or something. Then autorandr -s two-monitors
  • Set your machine in its alternate config, say, with the lid closed. Then autorandr -s closed-lid
  • Put autorandr -c in your ~.xprofile

This is enough for most things, ex­cept the bar sit­u­a­tion in QTile.

For that, I wrote two things. First a shell script that goes in ~/.config/autorandr/postswitch This is a "hook" that gets executed after the display configuration changes. Here's mine:

#!/bin/bash -x

config="$AUTORANDR_CURRENT_PROFILE"
notify-send "Switched to config $AUTORANDR_CURRENT_PROFILE"
killall -USR1 qtile  # Make qtile reread configuration

And why do I want qtile to reread its con­fig­u­ra­tion? Be­cause I want the systray to be on the "last" screen, which is al­ways larg­er :-)

Here's the relevant fragment from ~/.config/qtile/conf.py

screen_count = len(subprocess.check_output(shlex.split("xrandr --listmonitors")).splitlines()) -1

screens = [
    Screen(
        bottom=bar.Bar(
            [ ... # List of widgets for this bar
            # Add systray in the LAST screen, otherwise invisible widget
            widget.Systray(padding=10) if i==screen_count-1 else widget.Sep(linewidth=0),),
    ) for i in range(screen_count)]  

This so­lu­tion re­quires a min­i­mum of set­up for my stan­dards (just con­fig­ure your screens once and a bit of code) and a max­i­mum of ben­e­fit:

  • The same con­fig works on all my ma­chi­nes, ex­cept for au­toran­dr pro­files, which have to be done on each com­put­er
  • It works in a to­tal­ly au­to­mat­ed man­ner, I nev­er need to move screens around
  • It will work on any fu­ture com­put­ers thank to chez­moi

Chrome hates WMs

The Problem

I have seen it a few times in the past. I change WMs or desk­tops and sud­den­ly chrome has no idea where my pass­words wen­t. They are there in pass­word­s.­google.­com but chrome nev­er aut­ofill­s, and they are not list­ed in my lo­cal pro­file.

The Solution

Make sure you are running gnome-keyring-daemon and add this in ~/.config/chrome-flags.conf

--password-store=gnome

The Other Solution

You want a pass­word store that is not chrome. I have one in ad­di­tion of chrome, us­ing pass

This keeps my pass­words en­crypt­ed in Git (y­ou can use GitHub, I use my per­son­al gitea) and you can ac­cess them from the com­mand line, from a Chrome ex­ten­sion, or from a but­ton in my desk­top bar us­ing rofi-­pass

This en­sures I nev­er will lose ac­cess to my pass­word­s, and max­i­mizes the ways I can get to them while keep­ing things nice and se­cure.

Automounting Devices

The Problem

While I know per­fect­ly well how to mount de­vices in Lin­ux, I'd rather they mount them­selves.

The Solution

Use ud­iskie it's lightweight, nice­ly in­te­grat­ed, and it just works well by de­fault.

Notifications

The Problem

I want desk­top no­ti­fi­ca­tion­s.

The solution

Use dun­st it's lightweight, nice­ly in­te­grat­ed, and it just works well by de­fault.

Screen Locking

The Problem

I want my screen to lock, but don't want any­thing fan­cy.

The Solution

Use xss-lock and slock

While slock in itself works great, xss-lock integrates it with loginctl so it works better. Just add this to your ~/.xprofile:

xss-lock slock &

Pretty Icons and Colors

The Problem

I want sim­ple icons that are not very col­or­ful, so they in­te­grate with what­ev­er col­or scheme I am us­ing.

The Solution

Since I am fol­low­ing more or less a nord col­or scheme I am us­ing a com­bi­na­tion of Nordzy icons and just us­ing font-awe­some

Here are some snip­pets from the qtile con­fig. Where I am point­ing icons to a spe­cif­ic fold­er, that fold­er con­tains copies of nordzy icons con­vert­ed to PNG with trans­par­ent back­ground­s:

bottom=bar.Bar(
    [ ...
        widget.GroupBox(highlight_method="block", foreground="2e3440", active="d08770", inactive="4c566a", this_current_screen_border="242831",this_screen_border="88c0d0"),
        widget.BatteryIcon(theme_path="/home/ralsina/.config/qtile/battery_icons", background="d8dee9", mouse_callbacks=power_callbacks),
        
        widget.Volume(fmt="",padding=0, theme_path="/home/ralsina/.config/qtile/battery_icons"),
        
        widget.LaunchBar(padding=0, text_only=True, font="Font Awesome 6 Free", fontsize=16, foreground="2e3440", progs=[
                    ("", "rofi-bluetooth", "Bluetooth"),
                    ("", "rofi -modi 'clipboard:greenclip print' -show", "Clipboard History"),
                    ("", "rofi-pass", "Passwords"),
                    ("", "rofi-todo -f /home/ralsina/todo.txt", "Todo"),
                    ("", "flameshot gui", "Screenshot"),
                ]),
    ],
    background=["d8dee9"],
    border_width=[1, 0, 0, 0],  # Draw top and bottom borders
    border_color=["b48ead","b48ead","b48ead","b48ead" ],  # Borders are magenta

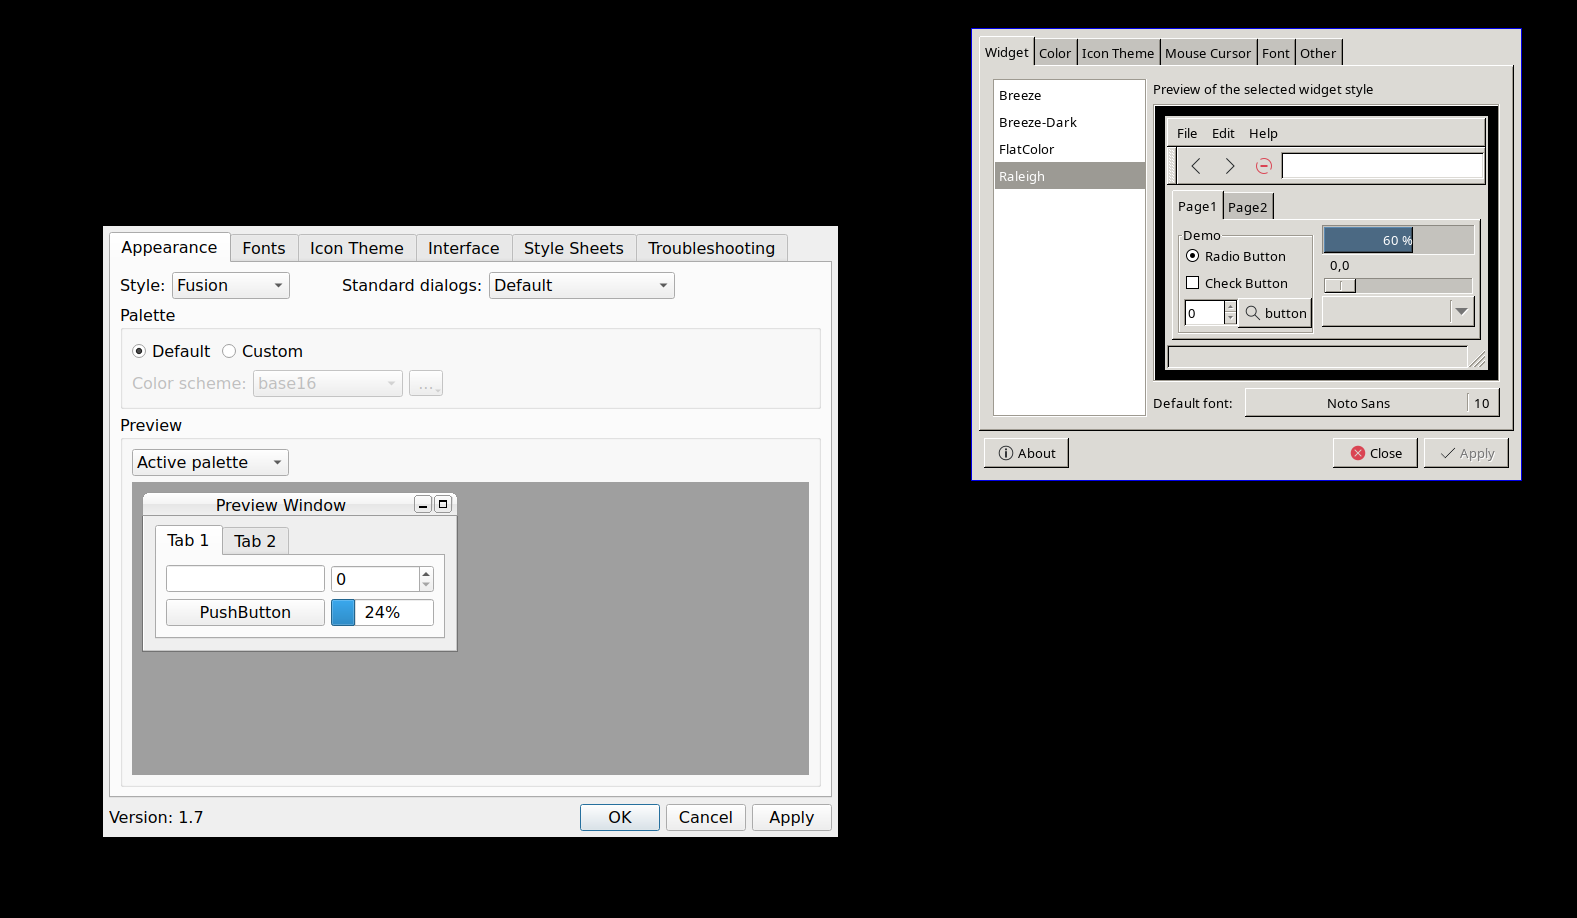
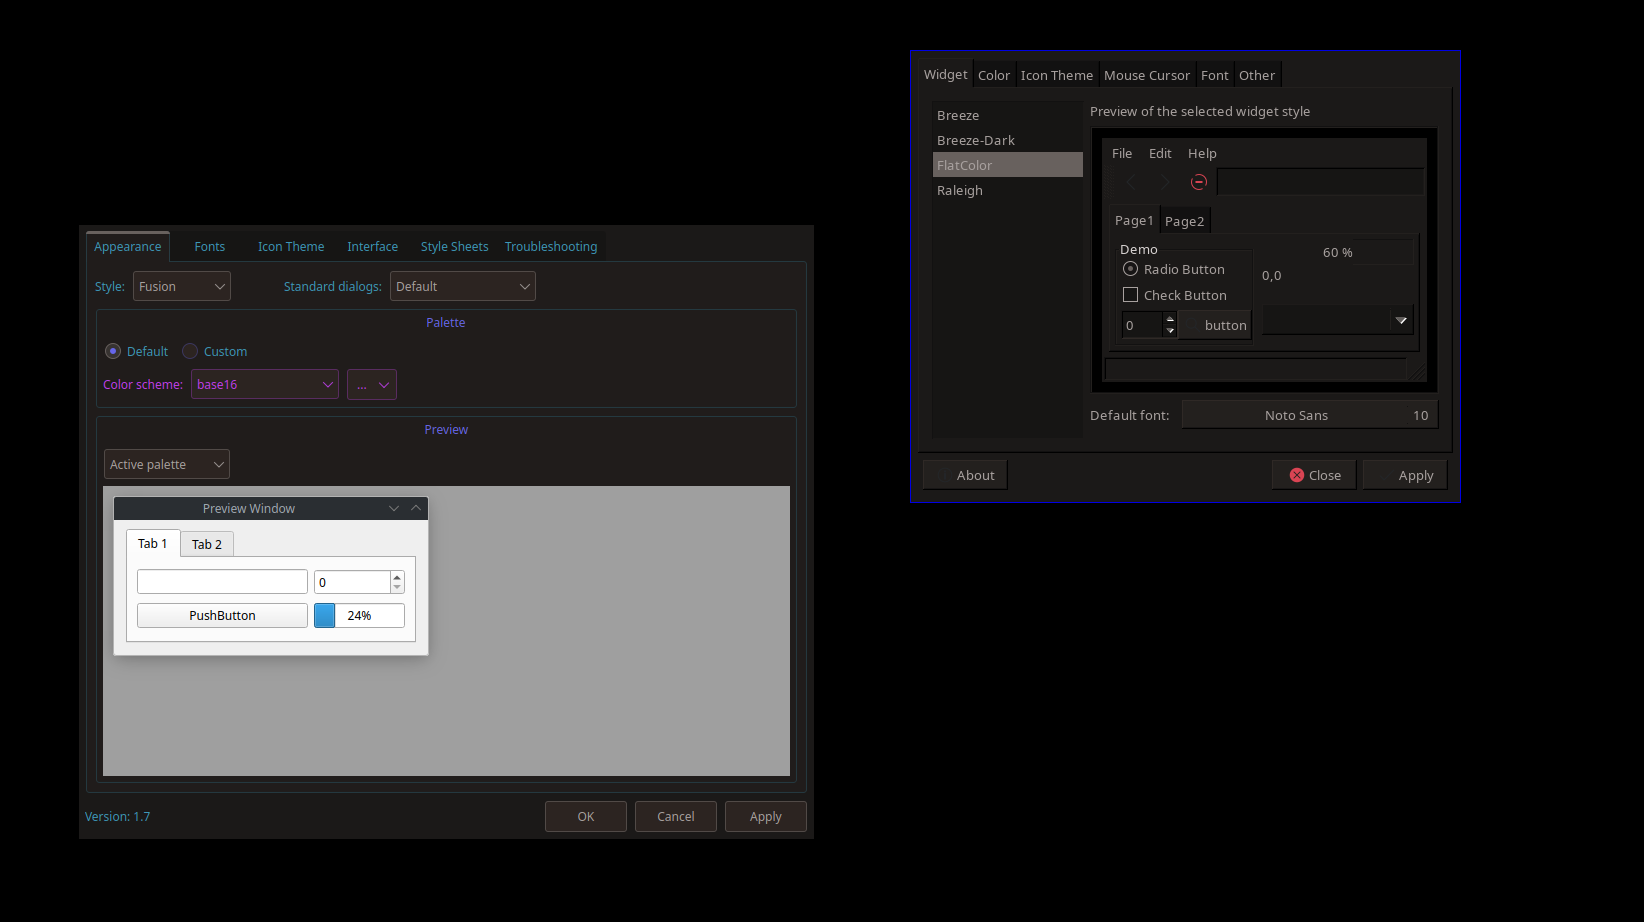
Then I configured styles and icons for gtk apps (using lxappearance) and Qt apps (using qt5ct) and things now look decent.

Color Schemes

The Problem

I want a co­or­di­nat­ed col­or scheme in the dis­parate tools I am us­ing.

The Solution

Up­date: I wrote a more tu­to­ri­al-­like thing about this called Col­or Co­or­di­na­tion Us­ing Base16

En­ter flavours, a tool to gen­er­ate con­fig­u­ra­tions for dif­fer­ent things out of sim­ple tem­plates and pre­de­fined col­or schemes.

It al­ready sup­port­ed my ter­mi­nal (alacrit­ty) and rofi, just need­ed to cre­ate tem­plates for my qtile con­fig:

colors = {
    "background": "#{{base00-hex}}",
    "background-lighter": "#{{base01-hex}}",
    "selection-background": "#{{base02-hex}}",
    "comments": "#{{base03-hex}}",
    "foreground-dark": "#{{base04-hex}}",
    "foreground": "#{{base05-hex}}",
    "foreground-light": "#{{base06-hex}}",
    "background-light": "#{{base07-hex}}",
    "variables": "#{{base08-hex}}",
    "integers": "#{{base09-hex}}",
    "bold": "#{{base0A-hex}}",
    "strings": "#{{base0B-hex}}",
    "quotes": "#{{base0C-hex}}",
    "headings": "#{{base0D-hex}}",
    "italic": "#{{base0E-hex}}",
    "tags": "#{{base0F-hex}}",
}

And my tmux­er (zel­li­j):

themes {
    default {
        fg "#{{base05-hex}}"
        bg "#{{base00-hex}}"
        black "#{{base00-hex}}"
        red "#{{base08-hex}}"
        green "#{{base0B-hex}}"
        yellow "#{{base0A-hex}}"
        blue "#{{base0D-hex}}"
        magenta "#{{base0E-hex}}"
        cyan "#{{base0C-hex}}"
        white "#{{base05-hex}}"
        orange "#{{base09-hex}}"
    }
}

And put the right in­can­ta­tions in the flavours con­fig (par­tial):

[[items]]
file = "~/.config/qtile/colors.py"
template = "ralsina"
subtemplate = "qtile"
rewrite = true
hook = "killall -USR1 qtile"

[[items]]
file = "~/.config/zellij/themes/default.kdl"
template = "ralsina"
subtemplate = "zellij"
rewrite = true

I will have to configure everything I want to follow my colour scheme but I can apply it to everything with a simple command like flavours apply monokai

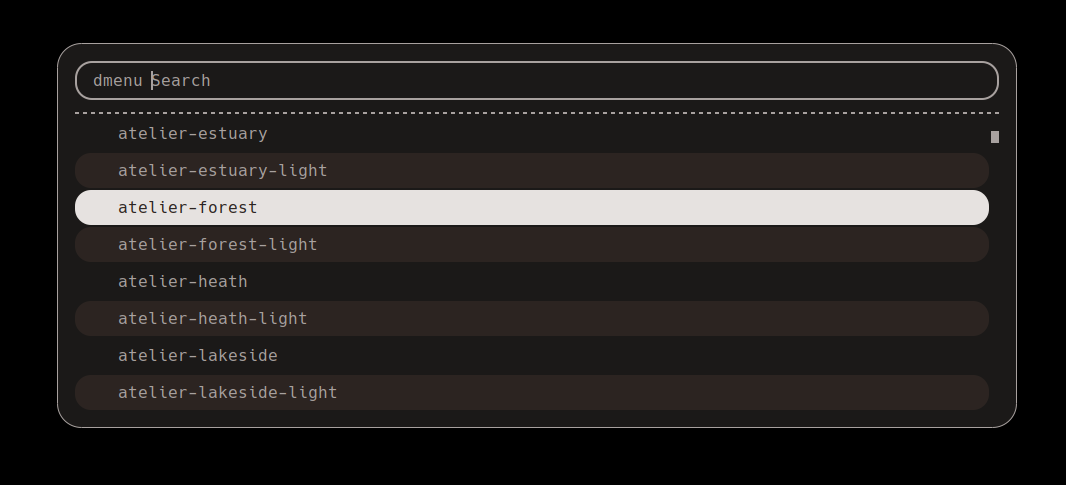
As an ex­tra, here's a script that lets you choose the col­or scheme us­ing rofi:

#!/bin/sh

LAST_SCHEME=$(cat ~/.local/share/flavours/lastscheme)
SELECTED=$(flavours list | sed 's/\s/\n/g' | grep -n $LAST_SCHEME | cut -d: -f1)

flavours apply $(flavours list| sed 's/\s/\n/g' | rofi -dmenu -selected-row $SELECTED)
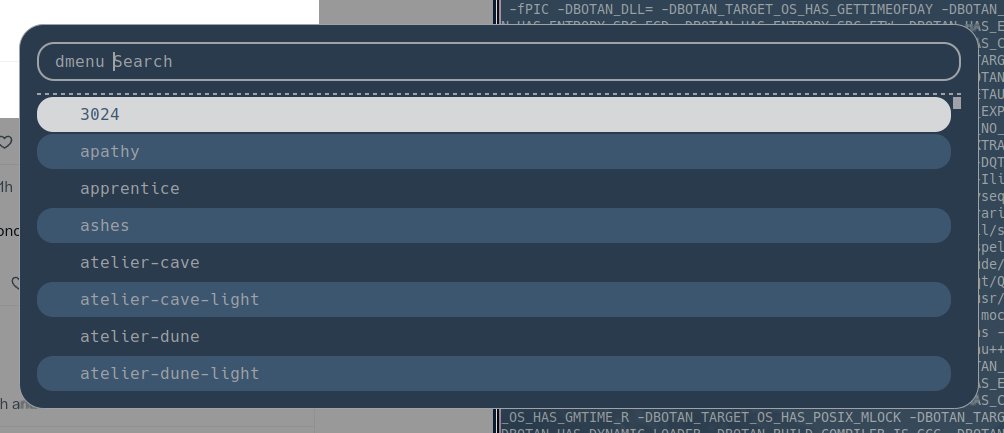
rofi choosing a color scheme

Conclusion

What can I say, I like it, it's not ug­ly, has all the func­tion­al­i­ty I want­ed and us­es around 400MB of RAM be­fore I start chrome. I am quite en­joy­ing it.

While this site (in­ten­tion­al­ly) has no com­ments, feel free to dis­cuss this in Red­dit

So I built a ... laptop?

Introduction

There is a vin­tage com­put­er that has al­ways fas­ci­nat­ed me. It was one of the first prac­ti­cal porta­bles, the Tandy Mod­el 100.

It ran on a few AA bat­ter­ies and had around 20 hours of bat­tery life. Does your lap­top do that? No.

It's icon­ic in mul­ti­ple ways.

  • That wide, stumpy screen!
  • That pre-IB­M-PC key­board with the funky cur­sor keys which now looks like ... a al­most nor­mal 60%?

The Mod­el 100 was an in­stant hit with jour­nal­ist­s, who could use its in­te­grat­ed text ed­i­tor to write on the road and its mo­dem to send sto­ries to the pa­per.

On the oth­er hand that form fac­tor just does­n't ex­ist any­more. It did­n't even sur­vive long in fur­ther Tandy mod­el­s, be­cause new­er bet­ter screens had a more "nor­mal" as­pect ra­tio and the now-­s­tan­dard clamshell made more sense.

But since I loved it... why not try to build some­thing like it now, when we have much bet­ter tech­nol­o­gy? Well, I could­n't come up with any good rea­son­s.

Ex­cept that I had no com­po­nents that could work in it.

And that I had no idea how to de­sign such a thing.

And that I knew noth­ing about any­thing like elec­tron­ic­s, 3d mod­el­ing, etc.

So, I de­cid­ed to do it. In late 2021. And I have spent the last 16 months or so work­ing on it.

And the 2nd pro­to­type ac­tu­al­ly work­s!

If the de­tails of how it's done are in­ter­est­ing to you, I have good news. I am about to write down A LOT OF DE­TAIL­S.

Design Idea

Even though this is what some may call a cy­berdeck I did­n't want it to be cy­ber­punk, or steam­punk, or any sort of punk.

I want­ed to make it as smooth, pol­ished, com­mer­cial-look­ing as I could with­in the con­straints of my abil­i­ty (which are plen­ty).

I want­ed it to look as what may hap­pen if por­ta­ble screens nev­er aban­doned the 5:1 as­pect ra­tio and clamshells did­n't ex­ist.

Did I suc­ceed? Hell no. This is janky as hell be­cause it's a hand­made pro­to­type, but it shows the seeds of pos­si­bil­i­ty, of it­er­a­tion that may make it ... pos­si­ble.

Hardware

SBC

So, what is the en­gine for the thing? When I was think­ing about how to make this func­tion­al, the ob­vi­ous thing was to use a SBC, such as a Rasp­ber­ry Pi.

OTOH I start­ed the project in the mid­dle of the pan­dem­ic short­age of SBC­s, which is still sort of on­go­ing, so those were hard to get, and ex­pen­sive.

So I turned to a lesser-­known brand which had the mag­i­cal thing: stock.

So, the SOC is a Radxa Ze­ro, a tiny SBC in the same form fac­tor as a Rasp­ber­ry Pi Ze­ro, ex­cept it's ridicu­lous­ly more pow­er­ful:

  • Quad core
  • 4GB of RAM
  • 32GB eMMC (no need for SD card)
  • USB 3.0
  • Mi­cro HD­MI port ca­pa­ble of 4k 60Hz

This is rough­ly 70% of the pow­er of a Rasp­ber­ry Pi 4, in a much small­er pack­age that us­es less than 5W of pow­er.

Keyboard

From the be­gin­ning I want­ed a me­chan­i­cal key­board. But I did not want to make my own be­cause that's a lot of work. So, I cre­at­ed soft­ware (more on that be­low) to make it pos­si­ble to just gut a cheap me­chan­i­cal thing and adapt the case so it would work.

Just be­cause I am not hard­core enough to live with­out cur­sor keys I de­cid­ed on a 65% board and the main cri­te­ria was "ships to my house and is cheap­est" so ... en­ter the "GANON 65%" cost­ing un­der 20 dol­lars.

It's ab­so­lute garbage. The sta­bi­liz­ers are hor­ri­ble, the switch­es are scratchy and in­con­sis­tent­ly clicky yet loud, and it was per­fect for the job be­cause all key­boards in 80s com­put­ers were pret­ty crap.

Oh, and it's one of those janky rain­bow fake-RGB back­lit things.

All of these cheap key­boards I've seen are one or two cir­cuit boards with through holes for screws. So I made the case with stands so they would snap in place and then be screwed in.

Power

The ini­tial idea was to use a sim­ple USB power­bank, but that does­n't re­al­ly work, be­cause they have a few un­for­tu­nate habit­s:

  • They of­ten are too bulky
  • There is no sim­ple way to turn them on or off with­out un­plug­ging things
  • Most of them CUT POW­ER OUT­PUT FOR A SEC­OND WHEN YOU PLUG THEM TO CHARGE

The last one is a killer. You can't use a lap­top that crash­es ev­ery time you plug it.

So, I got a "Rasp­ber­ry Pi UP­S" thing which is pow­ered by stan­dard 18650 bat­ter­ies. They are avail­able ev­ery­where and are very cheap, which is good.

In this im­age you can see the whole "pow­er sys­tem"

The green and white cylin­ders are the 18650 bat­ter­ies. They are in­sert­ed in a black case on top of a cir­cuit board. That is the "UP­S" sys­tem,

It can pow­er mul­ti­ple things via 2 US­B-A ports and a US­B-C port.

This par­tic­u­lar one has a but­ton to turn it on and off that is ex­posed in the back of the case as well as a mi­cro USB port to charge, which are ex­posed on the back of the case.

How­ev­er ... the but­ton on­ly turns off one of the pow­er out­put­s. If you look at the BOT­TOM of the "UP­S" you can see a pair of red and black ca­bles. Those are con­nect­ed to freak­ing pogo pins at the bot­tom of the UPS and go to a cou­ple of pins in the Radza Ze­ro to pow­er it.

This sucks a lit­tle be­cause I had to use that ad-hoc con­nec­tor in­stead of a sim­ple USB ca­ble and it means the "UP­S" has to be fair­ly sep­a­rat­ed from the bot­tom of the case (7m­m!), but hey, it work­s.

There are al­so a cou­ple oth­er wires, or­ange and blue. Those are con­nect­ed to a cheap volt­age-mea­sur­ing thing with LED­s. It costs about 50 cents and ... is not great.

OTOH I glued it to the IN­SIDE of the case and I think it looks awe­some.

It can stay turned on all the time be­cause it us­es so lit­tle pow­er it would have to be turned on for a month to drain the bat­tery.

The screen gets pow­er from a USB hub con­nect­ed to the Radxa Ze­ro, so I don't need to fig­ure out how to pow­er it from here.

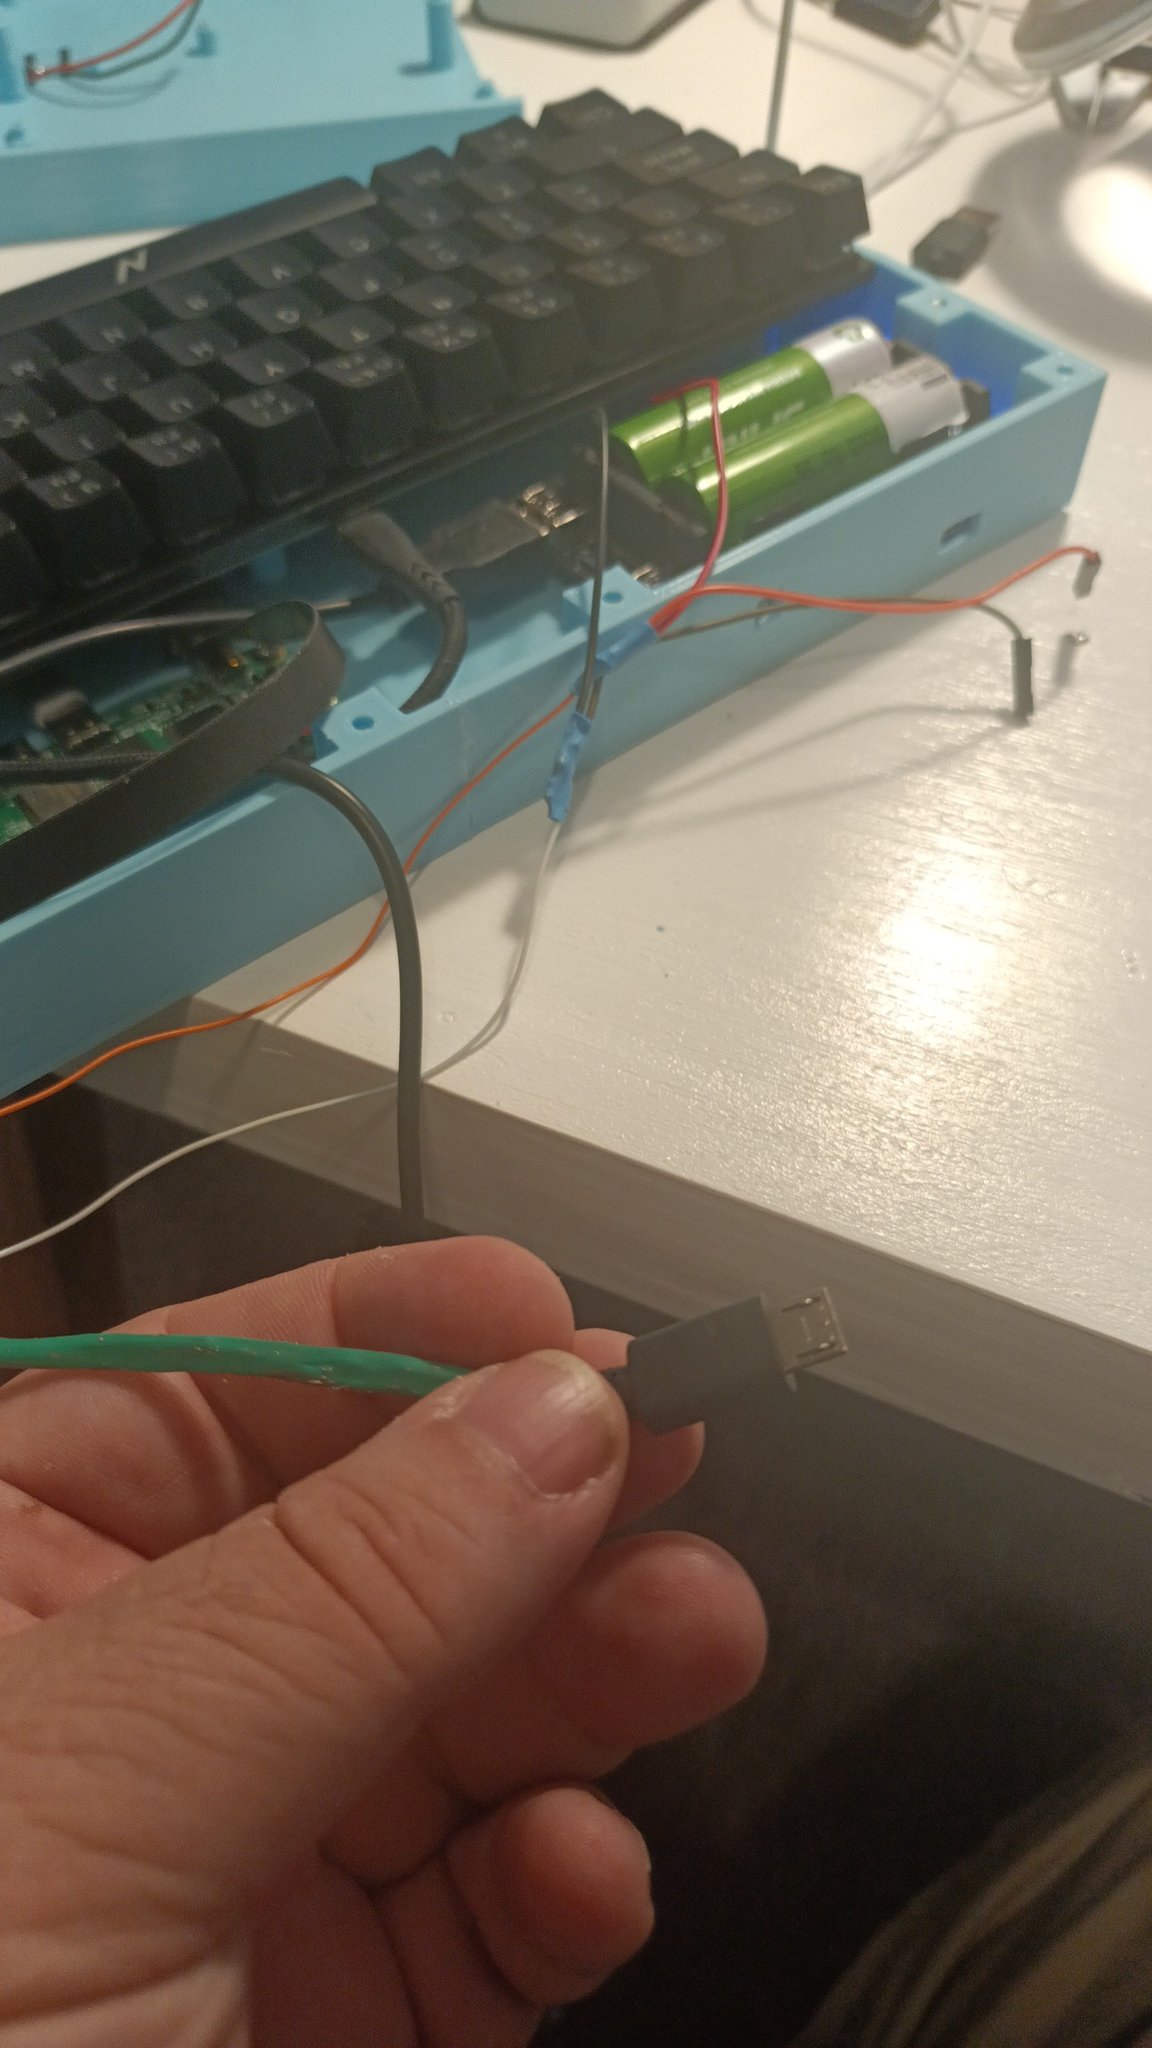
UP­DATE: Turns out the screen was draw­ing too much pow­er, so when the sys­tem got load­ed or an­oth­er pe­riph­er­al was added it got un­sta­ble and things turned on and off as it tried to keep up. I just spliced a mi­cro-USB pow­er-on­ly ca­ble in­to the pow­er from the pogo pins and it works just fine, ex­cept for the ug­ly, ug­ly ca­bling.

I/O

The Radxa Ze­ro has a pret­ty lim­it­ed port se­lec­tion, be­ing that smal­l.

  • HD­MI which is con­nect­ed to the in­clud­ed screen.
  • 1 USB 2.0 OTG port (unused for now)
  • 1 USB 3.0 port

So I need­ed to make that sin­gle USB 3.0 port do more things. Which means I got a USB hub.

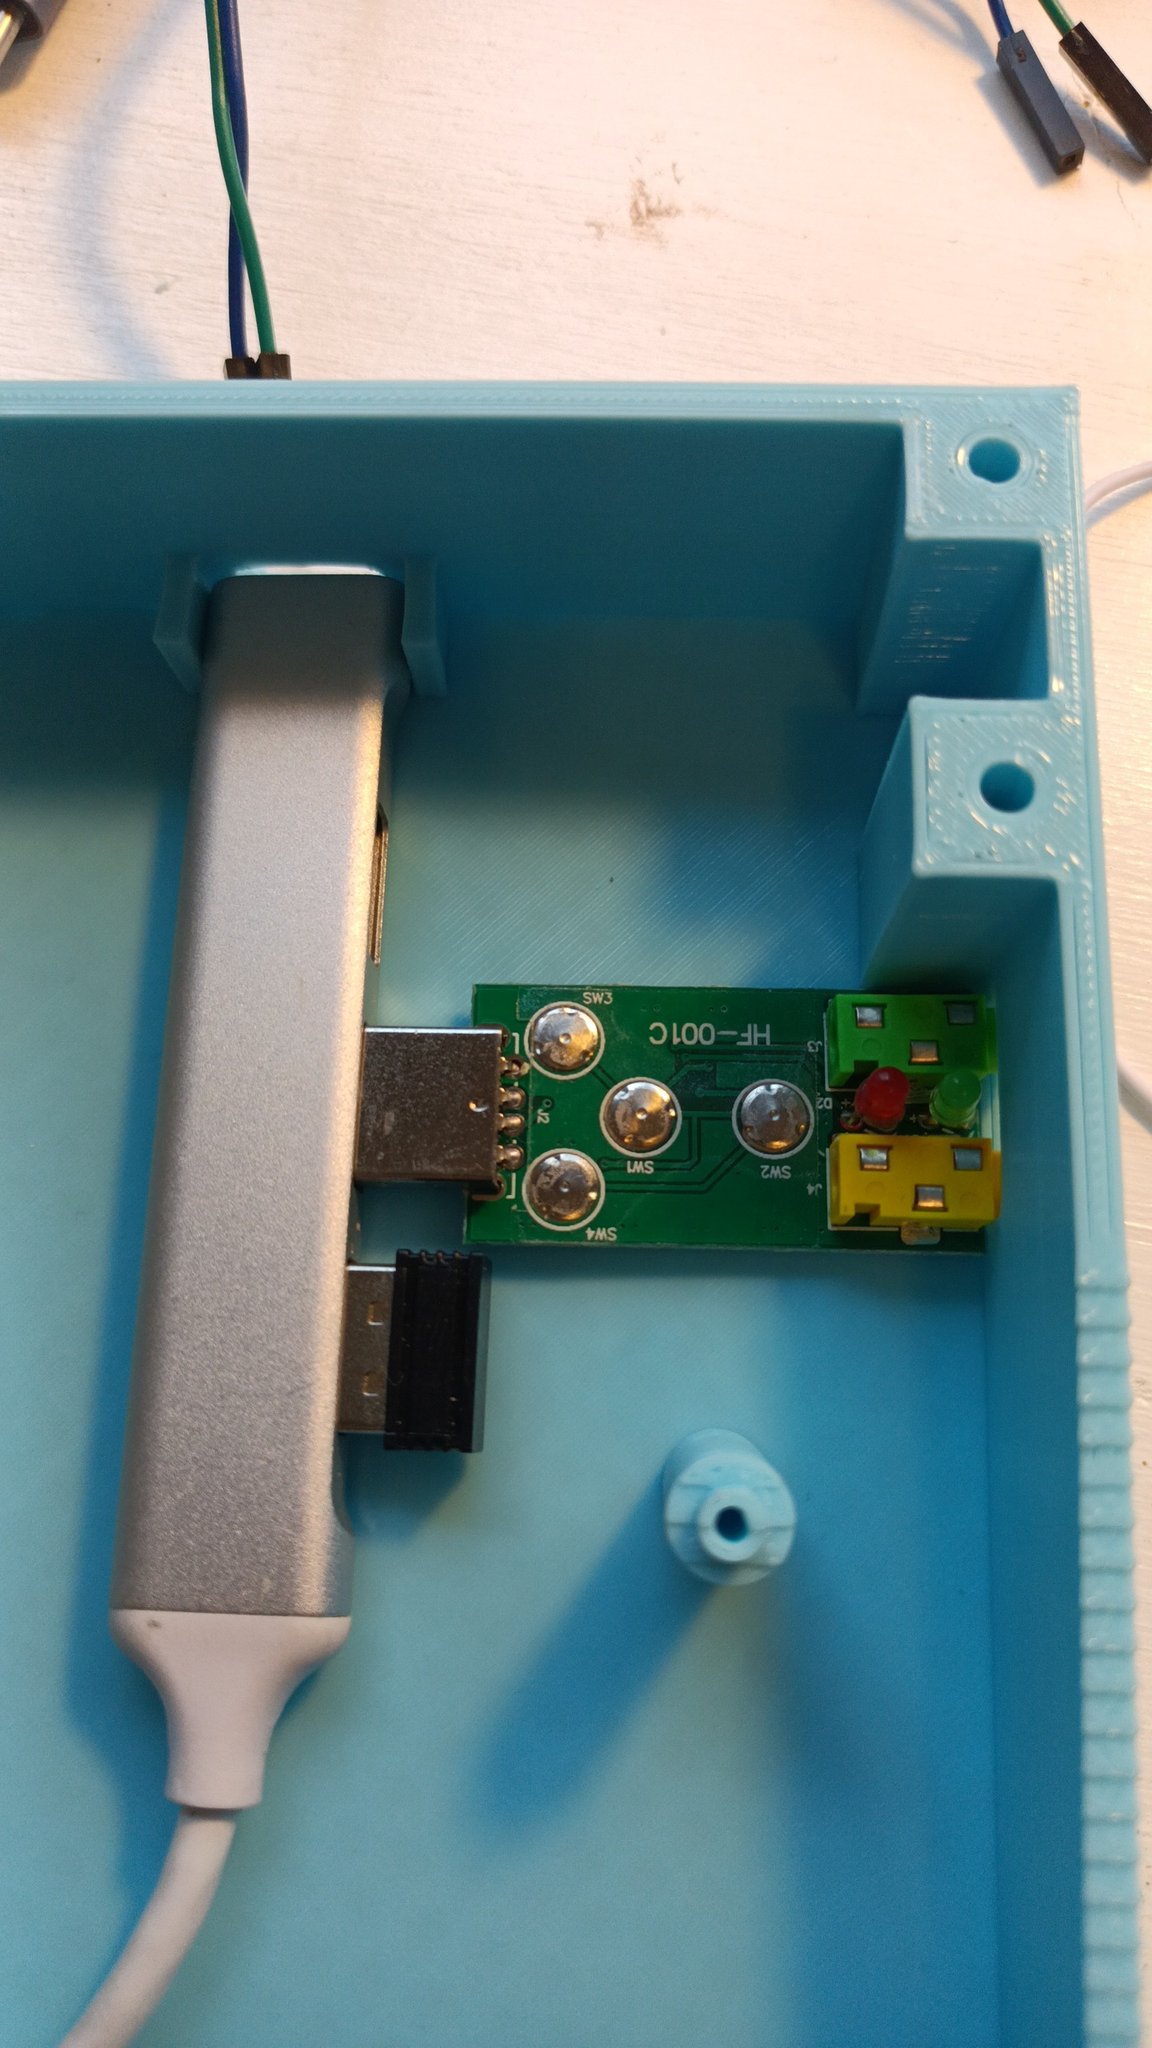
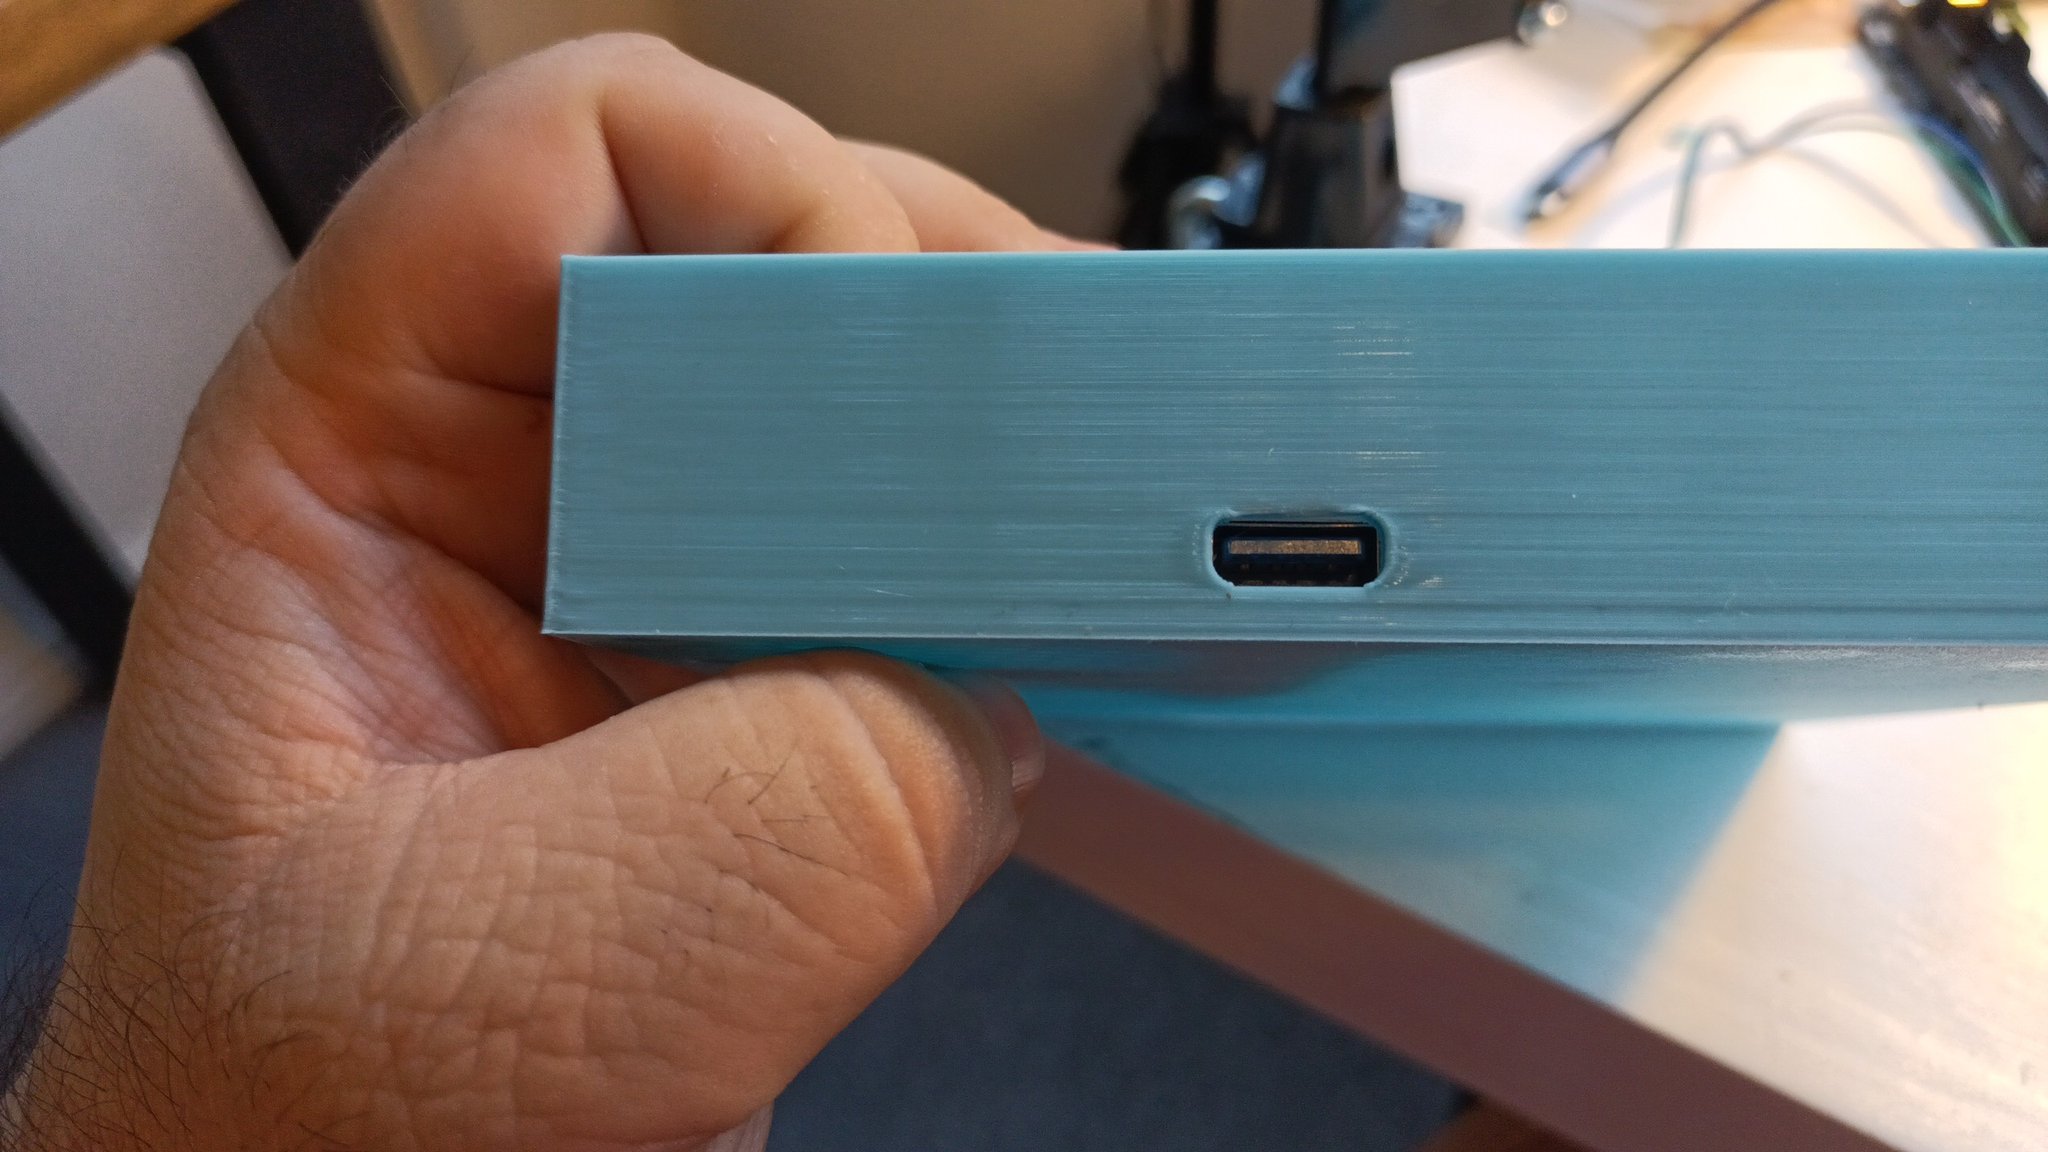
That's a alu­minum hub (be­cause why not) which has 4 port­s, 3 on the side, and 1 on the tip.

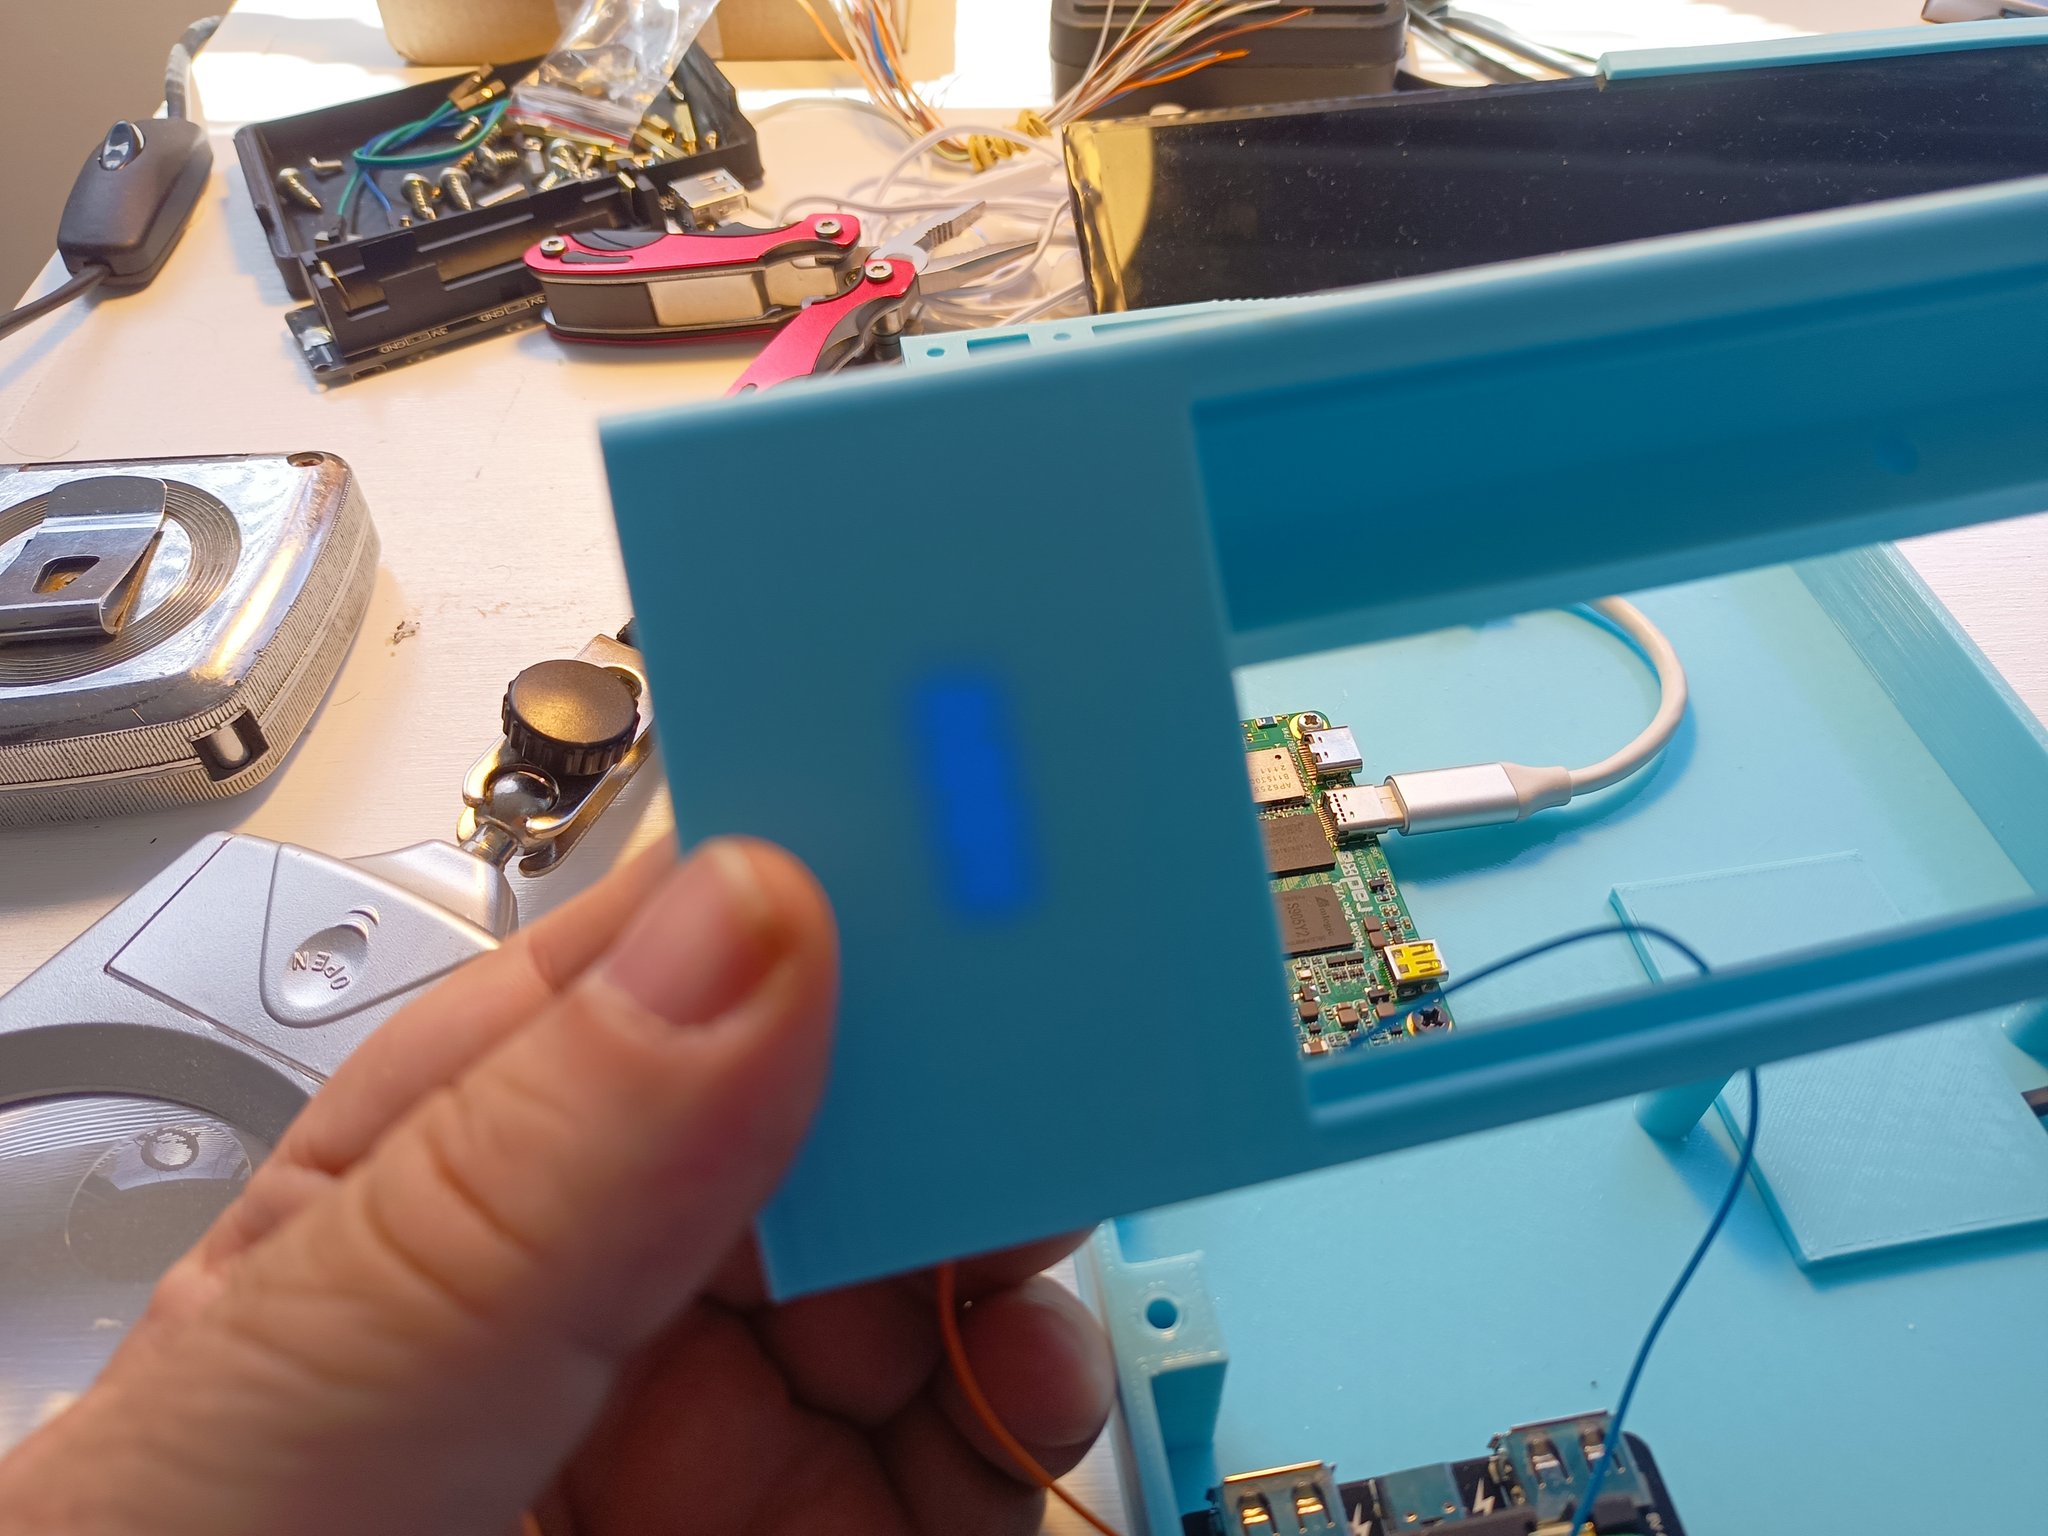
The port in the tip I ex­posed through a hole in the back of the case:

The ones on the right are used for:

  • Plug­ging the key­board
  • Pow­er­ing the screen
  • A USB sound card

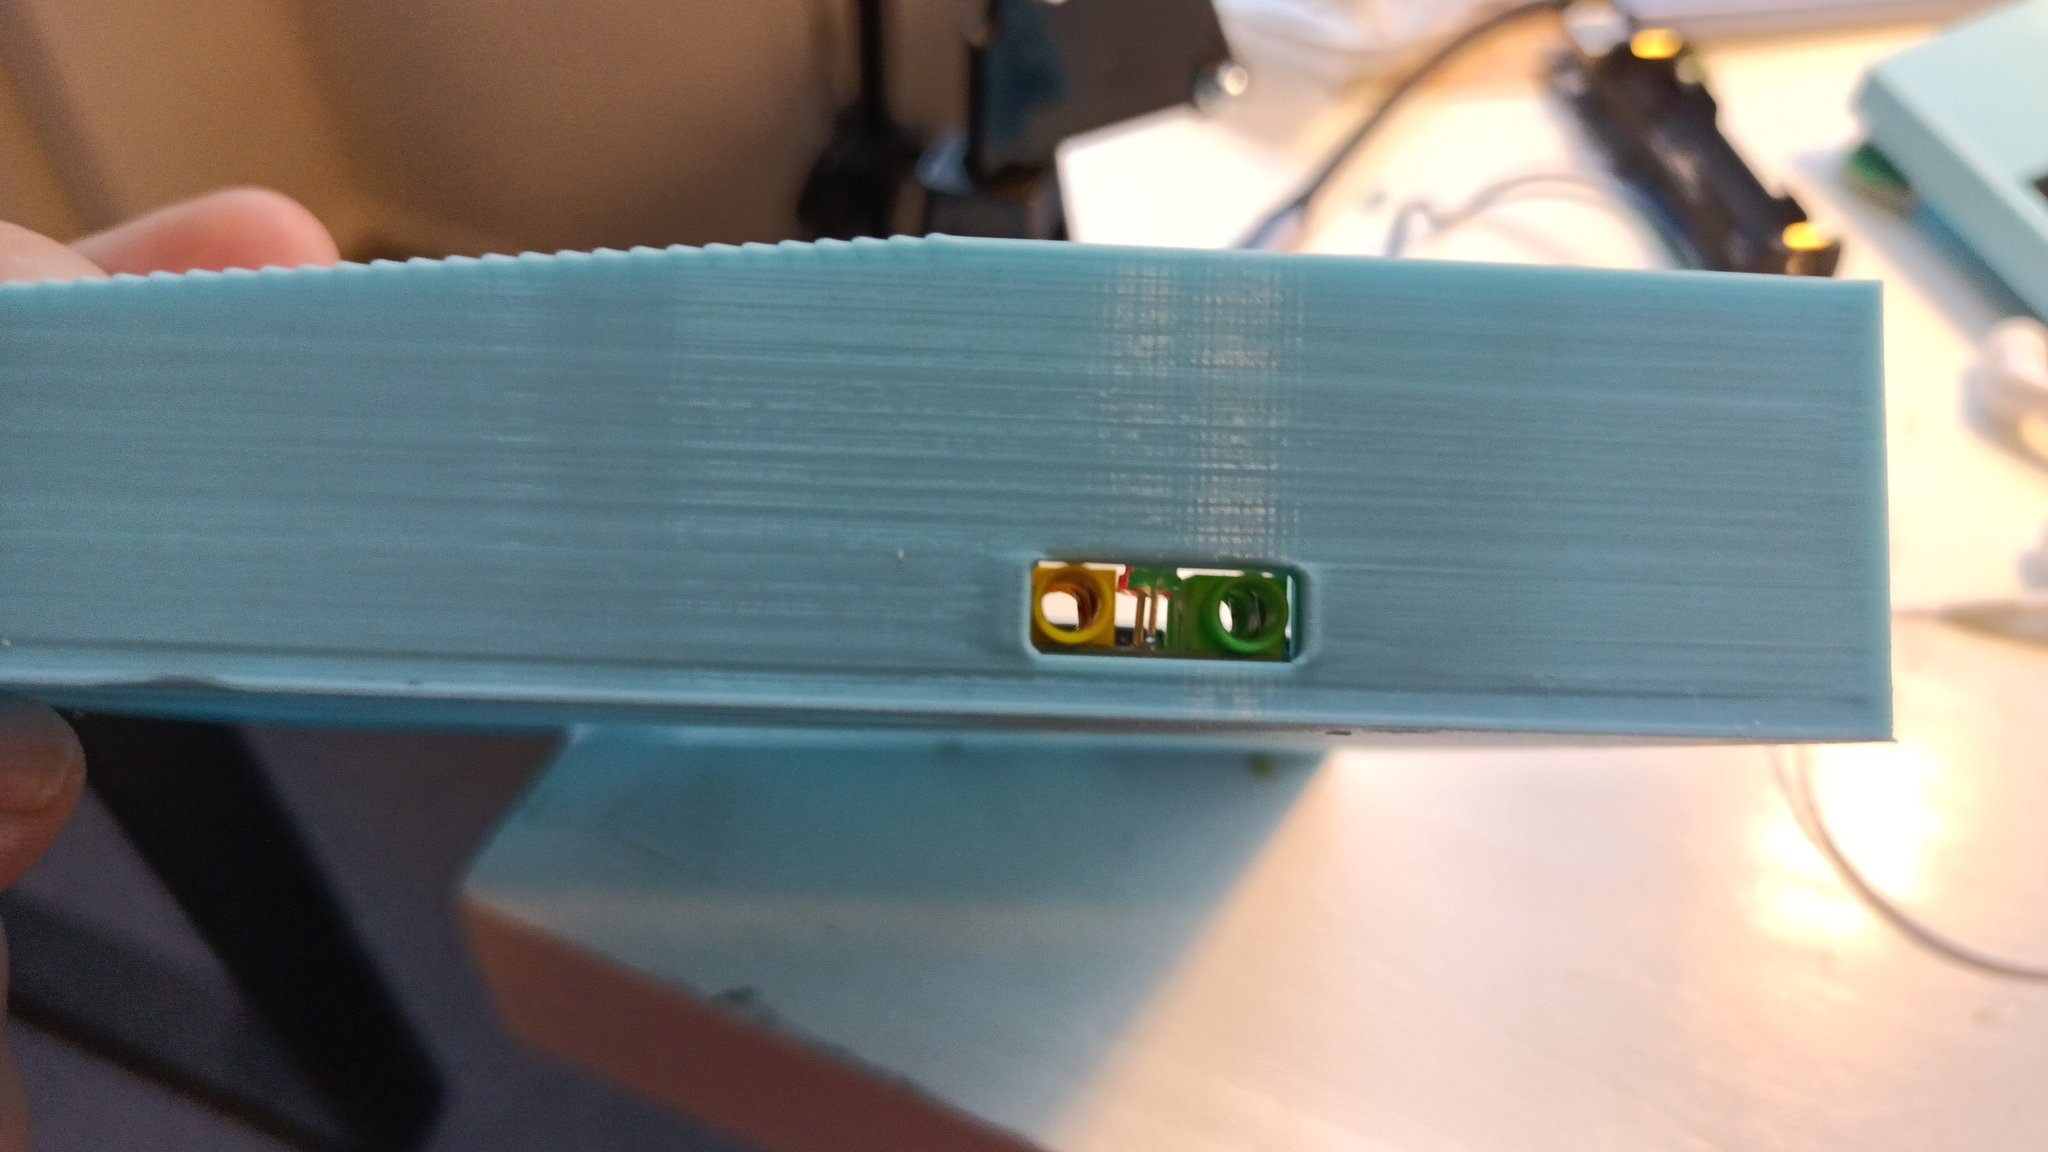
The au­dio jacks are ex­posed on the side of the case:

Up­date: Be­cause of the changes in how the screen is pow­ered now there is an­oth­er free USB port which means I may be able to pro­vide an ex­posed Eth­er­net port!

Screen

This is a gener­ic 1920x480 screen. I think they are made for car sys­tem­s, so they are bright and fair­ly af­ford­able, you should have no prob­lem find­ing one in your favourite chi­nese sup­pli­er.

If you can af­ford a touch ver­sion maybe that would be nicer, but this one is not touch, be­cause I ex­pect the main in­ter­face to be key­board based.

This weird sort of screen may or may not work with your op­er­at­ing sys­tem, spe­cial­ly if you are us­ing a not-­so-well-­known SBC like the Radxa Ze­ro.

I had to build a cus­tom ker­nel from github and that on­ly on Ubun­tu YM­MV.

One un­ex­pect­ed is­sue was that the dis­play of­fers mini-HD­MI and the SBC has a mi­cro-HD­MI port.

Have you ev­er seen a mini-mi­cro HD­MI ca­ble? Me nei­ther (un­til re­cent­ly) and if you try to use reg­u­lar HD­MI ca­bles and adapters ... the end re­sult is some­thing im­pos­si­ble to fit in­to a rea­son­able case.

So­lu­tion: flat, mod­u­lar HD­MI ca­bles!

You get the con­nec­tors you wan­t, the ca­ble length you wan­t, you snap them to­geth­er and voilá! Smal­l, flex­i­ble ca­ble with the con­nec­tors you need!

Did I men­tion that these ca­bles took 3 months to ar­rive? And I could not move for­ward with the build un­til they did? Be­cause they did take 3 months to ar­rive. So get a bunch at once.

Case

With all the com­po­nents above you can con­nect ev­ery­thing and have a work­ing ... thing. But you can't put it in your lap, so it's not a lap­top.

To com­bine them all you need a case. And in 2023, as a sim­ple per­son with no me­chan­i­cal tal­ents that means 3d print­ing.

BUT, I al­so lack any knowl­edge of 3D de­sign soft­ware.

BUT, I am a pro­gram­mer. So when I found I could write 3D mod­els as Python pro­grams I knew what to do: use Cad­Query

Then came a month­s-­long pe­ri­od of fig­ur­ing out how to cre­ate the case and how to print it and so on, but the end re­sult is two pieces:

The bot­tom piece is ba­si­cal­ly a box with pegs and holes where all the com­po­nents are mount­ed.

The top piece is where the screen goes.

Both of them have holes and stands so they can be screwed to each oth­er.

Be­cause they are too large, they are print­ed in halfs and then as­sem­bled.

With a larg­er 3D print­er I could print the base as a sol­id piece, how­ev­er, the top half needs to be split in half so the screen can slide in place.

All this is gen­er­at­ed by a cou­ple of Python scripts avail­able in my per­son­al code serv­er.

It's not all the way there yet, but the goal is to cre­ate a soft­ware pack­age that lets you (yes, you) set pa­ram­e­ters and make this work with your ran­dom col­lec­tion of mis­fit com­put­er hard­ware.

So, no screen? Print a lid, ex­pose the HD­MI port!

Have a Rasp­ber­ry Pi 4 in­stead of a Radxa Ze­ro? Sure, ad­just a few things and make it work.

Got a ran­dom key­board with 14 mount points in ran­dom places? Sure, mea­sure them and slap it in place.

But again: not there yet.

Performance

What can it do?

  • Run a web brows­er (tried Falkon)
  • Watch a Youtube video (or even two!)
  • Run a light­weight graph­i­cal desk­top
  • Run ter­mi­nal apps like a champ
  • Ed­it text and write code

So, it's good enough for light us­age, which is what I am aim­ing for.

Bat­tery life is be­tween 3 and 5 hours de­pend­ing on load.

Software

This is run­ning Ubun­tu Fo­cal with a cus­tom ker­nel and a patched dwm

The ter­mi­nal of choice is alacrit­ty be­cause while it us­es a lot more RAM than st it runs a bazil­lion times faster.

To mux the ter­mi­nal (alacrit­ty has no tab­s) I use zel­lij an awe­some and friend­ly al­ter­na­tive to tmux/screen/etc.

To browse the web I would love to use qute­brows­er be­cause of its awe­some key­board sup­port that makes the mouse an af­ter­thought. Bu­u­u­ut it's re­al­ly re­al­ly bro­ken in this Ubun­tu, so Falkon it is.

Do not try to get fan­cy with pow­er man­age­men­t. Things like up­ow­erd im­me­di­ate­ly throt­tle the CPUs to 100MHz mak­ing it im­pos­si­ble to do any­thing.

Oth­er than that, just the usu­al Ubun­tu un­der­neath it al­l.

Problems (TODO)

  • Air­flow is in­ex­is­ten­t, so it over­heats
  • When it over­heats it starts turn­ing off and on the USB port which makes ev­ery­thing work bad­ly.
  • The key­board is too high from the table, so that needs tweak­ing.
  • Be­cause of the bat­tery so­lu­tion it's kin­da thick at the back
  • The pow­er but­ton is re­al­ly hard to click
  • The bat­tery gauge sucks
  • Needs no-s­lip pads
  • Has no sup­port for a point­er (other than plug­ging a mouse) so an in­te­grat­ed track­ball or thinkpad-style nub would be nice.

Comments

This blog has no com­ments, but feel free to dis­cuss it in this red­dit post

Pet Server (Feb 2023 update)

This is a longer-term up­date on the state of my home serv­er. You can read more about it in these 1 2 3 4 5 post­s.

Not much has changed in it, to be hon­est.

Hard­ware's the same as in the past, ev­ery­thing is work­ing fine. I have a good back­up of the serv­er us­ing what I de­scribed here and I have ac­tu­al­ly test­ed it. I can bring it back up in un­der half an hour, which is ok.

I am con­sid­er­ing get­ting a bet­ter USB hub, be­cause the one it's us­ing now is pret­ty slow for the stor­age. Not slow enough that I can no­tice but slow­er than it could be.

I may re­do the case be­cause I have learned a lot about mak­ing cas­es and can do a bet­ter one :-)

What could im­prove?

  • Some things are tricky to de­ploy in ARM
  • Some of my ad-hoc im­ple­men­ta­tions are clunky
  • I am not re­al­ly us­ing the whole me­dia serv­er im­ple­men­ta­tion all that much

How hap­py am I with it? Su­per hap­py. I use it ev­ery day, it's re­li­able and ba­si­cal­ly main­te­nance-free.

How much energy does my office server use?

Just ran in­to this video where the host ex­plains how he's us­ing a home serv­er and how he made it use un­der 23W, and the steps he took to make it qui­et and ef­fi­cien­t.

So, know­ing that our servers are not com­pa­ra­ble I want­ed to check how much pow­er my serv­er used.

Yes, my serv­er is pret­ty un­usu­al, you can read about it here: 1 2 3 4 5

First let's look at MAX­I­MUM pow­er draw for all com­po­nents.

  • Com­put­er (Radxa Ze­ro): 900 mA at 5V
  • HD­D: 500 mA at 5V (x2)
  • Net­work USB adapter: 500 mA at 5V

There is al­so a USB 3.0 hub there but the pow­er us­age is neg­li­gi­ble, prob­a­bly be­low 100 mA at 5V.

So, the max­i­mum pow­er us­age is ~2400 mA at 5V, which is about 12 watts.

When more or less idle, mea­sured with a USB thingie, the Radxa Ze­ro us­es ~200 mA and the Net­work adapter nev­er seems to go above 150 mA, so a low­er bound is maybe about ~1300 mA, or about 6 watts.

And then there's cost. My whole sys­tem (which does ev­ery­thing I want nice­ly AFAIC­S) costs un­der 100 dol­lars. And my pow­er bill from it is, if it runs full throt­tle ALL THE TIME (it does­n't) ... $87

Mind you, that's 87 ar­gen­tini­an pe­sos, or be­tween 50 and 25 USD cents, de­pend­ing on your ex­change rate.

I think I'll man­age.


Contents © 2000-2024 Roberto Alsina